Step-by-Step Guide on Creating YouTube Content via AI

Harnessing the power of artificial intelligence (AI) for creating YouTube videos can revolutionize your content strategy in ways previously unimaginable. AI technologies, like automated editing tools and algorithm-driven analytics systems, are reshaping how we produce and optimize content for YouTube. For instance, applications like Magisto and Lumen5 use AI to automate video editing - you simply input raw footage, choose a style and soundtrack, then the AI does the rest, creating a polished final product in minutes. Then there are analytic tools like vidIQ and TubeBuddy that utilize AI to delve into the deep data of your videos to optimize keywords, tags, descriptions, and even suggest the best times for publishing. Such tools work by arming themselves with information from billions of videos, using AI's machine learning capabilities, to guide creators for heightened engagement and visibility. Hence, creating YouTube videos with AI is about utilizing smart technologies to enhance video production and optimize content strategy, paving the way for accessible, premium-grade YouTube video creation for creators of all sizes.
Step 1: AI Script Generation

Stepping into the YouTube realm with the aid of Artificial Intelligence? Brilliant! We're going to kick-start our journey by generating a script. But not just any script - this is a clever, AI-crafted script that is both engaging and SEO-friendly.
Our tool of choice? The remarkable Jasper.ai. It's like having your own personal scriptwriting genius at your disposal. Here's a simple, step-by-step guide to creating your very first AI-powered script:
Start the Adventure: Head over to the Jasper.ai website. If you're not already a member, sign up to start your journey.
Find Your Workspace: Once you've logged in, navigate to the dashboard. You'll see a 'Create New Document' option – click on it.
Set the Scene: You'll be asked to choose a template. Since we're creating a script for a YouTube video, select the 'Video Script' option.
Clarify Your Intent: Jasper.ai will ask for your intent. For example, if you're creating a gardening tutorial, input your relevant keywords like 'gardening' or 'plant growth'. This is like giving your AI helper a creative brief.
Let the Magic Begin: Once you've set your intent, click 'Write for me'. Jasper.ai will work its magic, creating an engaging, SEO-optimized script based on your input.
Add Your Personal Touch: Review your AI-generated script. You can tweak the tone, whether it be casual or formal, to match your audience's preferences. Remember, Jasper.ai is your tool - you're the artist.
By embracing AI for script generation, you'll save precious time and add consistency and structure to your content. And when your content is well-organized and engaging, your viewers stick around longer. It's like having a recipe for success, right at your fingertips. So, get ready to see your YouTube videos shine with the power of AI. Let's create not just videos, but experiences that have your audience coming back for more. Happy creating!
Step 2: Script-to-Video Magic with Lumen5

Meet Lumen5, a game-changing platform that transforms text into stunning video content with ease. An absolute godsend for content creators, marketers, and storytellers alike, Lumen5 utilizes artificial intelligence to simplify and streamline the video-making process, making it the go-to choice for beginners and professionals alike.
Creating a captivating video with your script using Lumen5 is a breeze. Here's a straightforward, step-by-step guide to navigate the process:
Visit Lumen5: Start by heading over to the Lumen5 website. If you're not a user yet, sign up for a new account; otherwise, log in with your credentials.
Create a New Video: On your dashboard, click the 'Create New Video' button, typically found in the top right corner of the page.
Choose 'Start with a Script': Lumen5 will ask you how you'd like to start. Choose the 'Start with a Script' option.
Input Your Script: Paste your pre-prepared video script into the text box that appears. After you've input the script, click 'Next'.
Generate Storyboard: Lumen5's AI will automatically analyze your script and break it into a series of scenes, each displayed as a separate storyboard panel. This is your basic storyboard. You can edit each scene by clicking on it.
Customize Your Storyboard: Now the fun begins. On each scene, you can choose from various media options like images, video clips, and GIFs suggested by Lumen5, or upload your own. You can also tweak the text, position, highlight key phrases, or add a text animation.
Add Music and Voiceover: Click on the 'Music' tab on the left-hand sidebar to choose a soundtrack that complements your video's mood. If you want to add a voiceover, you can do so by clicking the microphone icon on each scene.
Step 3: Creating Talking Avatars with Synthesia

The next stage of our video creation journey introduces the fascinating world of talking avatars, but remember, this step is completely optional. If your content strategy involves a speaking persona or you want to add an engaging twist to your videos, creating a talking avatar using Synthesia can significantly boost viewer engagement and interest. However, if your content doesn't require a personalized avatar, feel free to skip this step and continue to the next stage of your video creation process. Remember, the goal is to produce content that best aligns with your vision and resonates with your audience. So let's explore this exciting option, and if it fits your needs, dive right in!
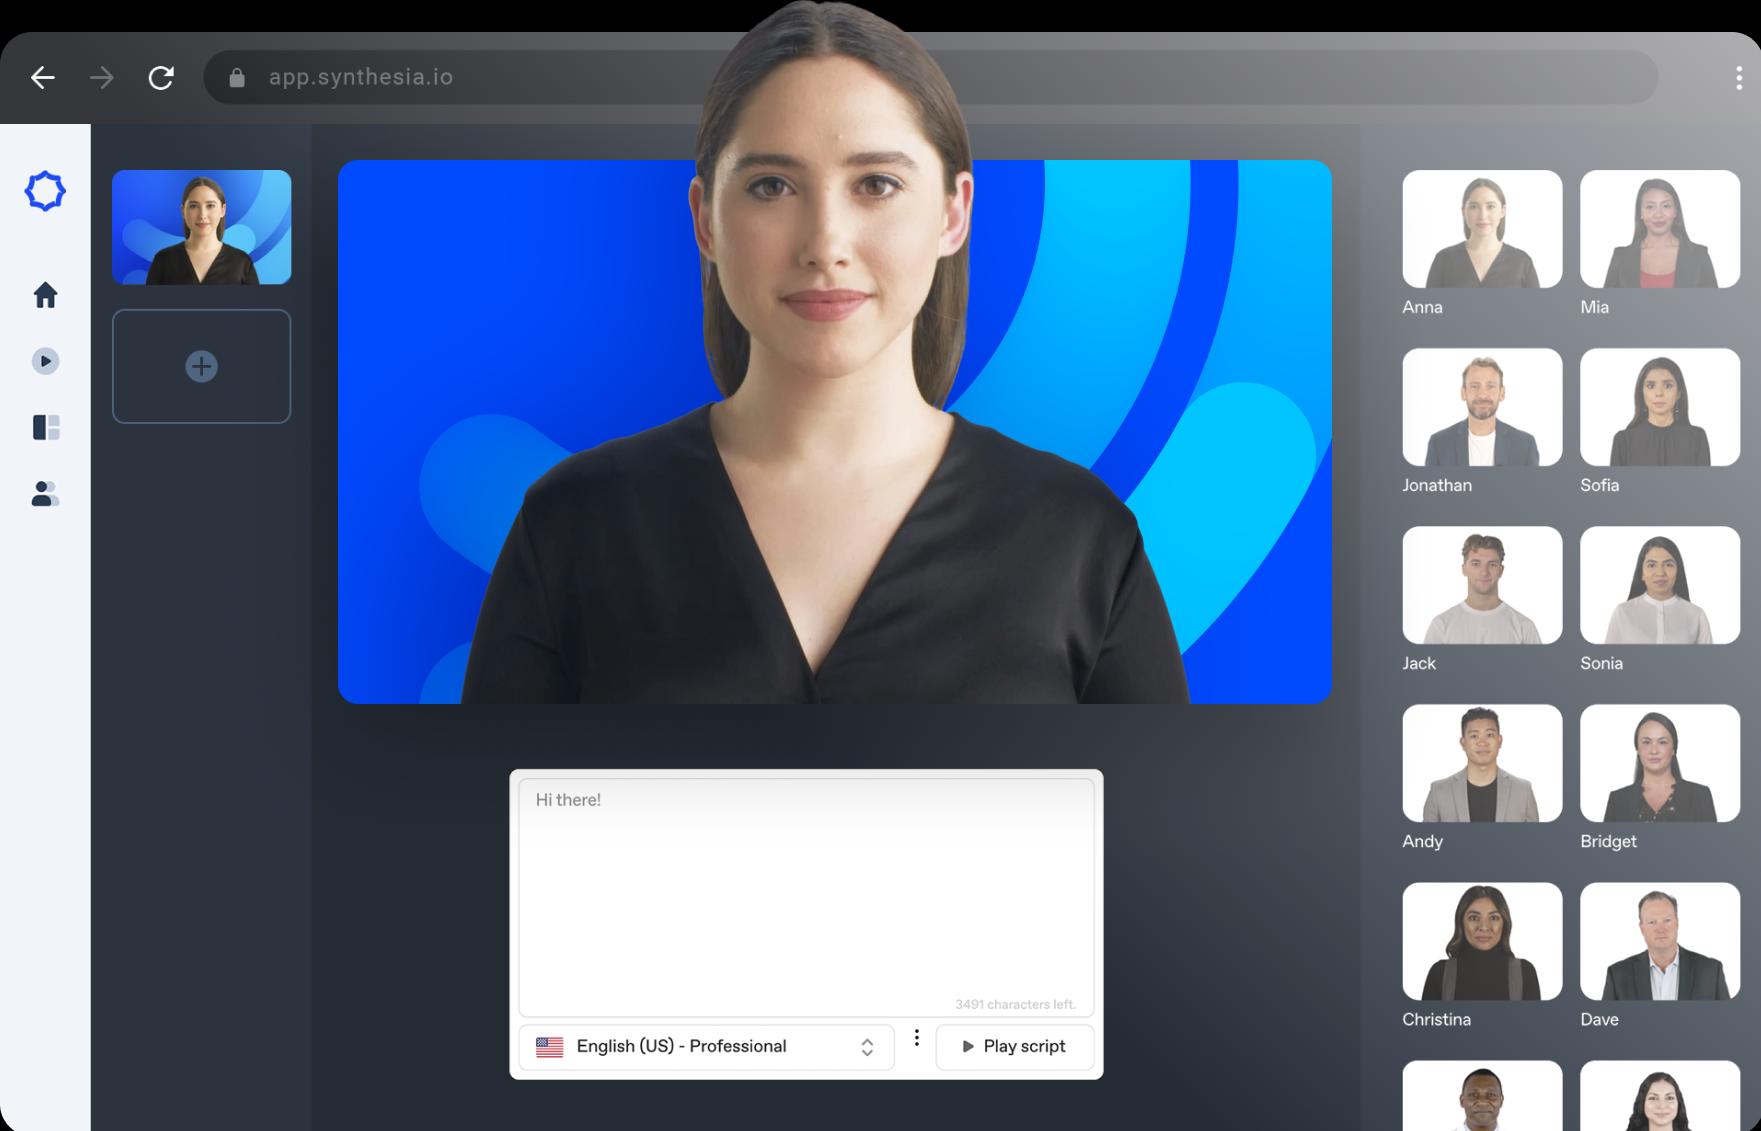
Synthesia is an innovative platform that allows you to create AI-generated videos featuring realistic avatars. With it, you can design your very own talking avatar, and all it takes is a script! Here's how you can use Synthesia to bring your avatar to life:
Start by Visiting Synthesia: Open your browser and head over to the Synthesia website. Sign up for an account if you don't already have one, or log in if you do.
Create a New Project: On your Synthesia dashboard, click on the 'Create Video' button.
Choose Your Avatar: Synthesia will prompt you to select an avatar. You have the choice to choose from a diverse range of pre-designed avatars.
Input Your Script: After selecting your avatar, you'll see a text box. Here, you input your script. Remember, the script is the speech your avatar will deliver.
Select the Language and Accent: If your avatar should speak in a language other than English or with a specific accent, select your preferred language and accent from the dropdown menus.
Preview Your Avatar: Click on 'Generate Preview'. Synthesia will create a short preview of your avatar speaking the first part of your script.
Edit if Necessary: If there are any changes you'd like to make to the script or the avatar, you can do so now.
Create the Full Video: Once you're satisfied with the preview, click 'Create Video'. Synthesia will render your full video, which can take a few minutes.
With Synthesia, you'll add a whole new level of personalization and engagement to your content, making your videos more appealing to your YouTube audience. It's time to let your avatar do the talking!
Step 4: Voiceovers Made Easy with WellSaid Labs

As we continue, the next step is for those who desire to add a rich layer of audio to their visuals: voiceovers. If your content involves narration, instructional dialogue, or simply could benefit from an audible touch, you might want to consider creating a voiceover. With the rise of artificial intelligence, generating professional-sounding voiceovers has never been more accessible. So, if your video calls for a voice, follow these simple steps to create a compelling AI-generated voiceover using WellSaid Labs. If voiceovers aren't a part of your video blueprint, feel free to move on to the next step in your content creation process. Remember, your video, your rules!
For many video creators, the cherry on top of their content is a captivating voiceover. Thankfully, AI technology has simplified this process too. One such tool is WellSaid Labs, a powerful AI-driven platform that enables you to create lifelike voiceovers with incredible ease and speed. Here's how to create a captivating AI voiceover with WellSaid Labs:
Visit WellSaid Labs: Head over to the WellSaid Labs website. If you don't have an account, take a moment to sign up; otherwise, log in with your existing account.
Create a New Project: Once you're logged in, start a new project by clicking the 'New Project' button. Give it a name that reflects the voiceover you're creating for easy reference later.
Choose a Voice: Browse through the range of AI voices available. Listen to the samples and choose one that fits the tone and mood of your content.
Enter Your Script: In the text box provided, type or paste the script you want the AI voice to speak. Be sure to include all necessary punctuation and pauses to make the speech sound as natural as possible.
Generate Your Voiceover: Click 'Generate' to have the AI produce your voiceover. This can take a few moments, depending on the length of your script.
Review and Edit: Listen to the AI-generated voiceover. If any adjustments are needed, like changing the voice, speed, or emphasis, edit the settings and click 'Regenerate'.
Download the Voiceover: Once you're satisfied with the voiceover, click 'Download' to save the audio file to your device.
With these straightforward steps, WellSaid Labs turns the often daunting task of voiceover creation into an effortless process, allowing you to add a professional-grade, engaging voice to your video content. Now, let's hear your content speak!
Step 5: AI Thumbnail Generation

To create a captivating YouTube thumbnail using the combined powers of AI text and image generation, we'll be pairing OpenAI's ChatGPT for idea generation with ClipDrop's Stable Diffusion XL for visual creation. Here's the process step by step:
Use ChatGPT for Idea Generation: Start with your video script and OpenAI's ChatGPT. Simply ask ChatGPT to generate an image prompt based on your script. For example, you could input "Generate an image prompt for a YouTube video about gardening tips." ChatGPT will generate a detailed, creative image idea tailored to your content.
Copy the Image Prompt: Once you're satisfied with the image idea generated by ChatGPT, copy this prompt. It will serve as the basis for creating your image with ClipDrop's Stable Diffusion XL tool.
Visit ClipDrop: Navigate to the ClipDrop website in your browser. If you don't have an account yet, you'll need to sign up; otherwise, log in with your existing account.
Access Stable Diffusion XL: Go to 'Tools' and select 'Stable Diffusion XL' from the dropdown menu. This tool will let you generate a unique image based on your text prompt.
Paste Your Prompt: In the text box, paste the image prompt you generated using ChatGPT. The more detailed and descriptive your prompt, the better the result will be.
Generate Your Image: Click 'Generate' to start the AI image creation process. The AI will use the description you provided to generate an image that aligns with your YouTube video content.
Review and Save: Review the generated image. If you're happy with the result, click 'Download' to save the image. If it's not quite right, adjust your prompt and try again.
Apply the Thumbnail to YouTube: Finally, upload the AI-generated image as your YouTube video thumbnail. You'll find this option in the video details when uploading your video to YouTube.
By using this combination of ChatGPT for creative idea generation and ClipDrop's Stable Diffusion XL for visual execution, you can create an attention-grabbing thumbnail that truly captures the essence of your video content. Now it's time to let AI help you shine on YouTube!
Putting the Pieces Together

After traversing the fascinating journey of scripting, storyboarding, creating a lifelike avatar, narrating a voiceover, and designing a click-worthy thumbnail, we're now ready to wrap up these individual elements into an engaging YouTube video. Here's how to wrap things up using Lumen5 and publish your creation on YouTube:
Circle back to Lumen5: Go back to Lumen5's website and open your project.
Import Your Clips and Audio: Bring in the assets you've created, including your talking avatar from Synthesia and the AI-generated voiceover from WellSaid Labs.
Arrange Your Assets: Set your clips in the right order that follows your storyboard using Lumen5's intuitive interface.
Preview Your Creation: Use the 'Preview' option to watch your video and ensure it flows seamlessly.
Edit as Needed: If you spot areas that need adjustment, be it clip order, sound balance, or transition timing, go back and refine as necessary.
Click on 'Publish': Once you're content with the look and feel of your video, proceed to the 'Publish' tab.
Download Your Video: When you're ready, hit the 'Publish' button. This will finalize your video and prepare it for download. Save the file onto your device.
Navigate to YouTube: Go to YouTube and log in. Click on the 'Create' icon, typically a video camera symbol, at the top right and select 'Upload Video'.
Upload and Detail Your Video: Find the downloaded video file from Lumen5 and upload it. While the video uploads, you can add details such as title, description, and tags. This is also the stage where you'll upload your compelling thumbnail created with ChatGPT and ClipDrop's Stable Diffusion XL.
Hit 'Publish' on YouTube: Once you've added all the details, click 'Publish'. Your video is now live for the world to see!
There you have it! By leveraging AI technology, you've navigated the YouTube video creation process with ease. Your AI-crafted video is now ready to captivate viewers. Sit back, relax, and let your hard work do the talking.
